Introduction
Some programmers enjoy writing unit tests, while others are indifferent or even dislike the process. In game development, in particular, fewer programmers seem to incorporate unit testing into their workflow. This post serves as an introduction to why and how you should write tests for your code. For those already familiar with unit testing, this post may not provide many new insights. However, if you’re one of the programmers who has heard about unit testing, understands its value, but has struggled to integrate it into your workflow, this post is for you.
Rather than being a highly technical guide, this post focuses on how to gradually incorporate unit testing into your workflow, instead of forcing it and eventually abandoning it. In game development, testing comes with unique challenges that can make it harder to adopt as part of your daily routine.
I’ll begin by discussing whether you should test your code and the rules and principles to follow when starting with unit testing. Next, I’ll cover what makes testing in game development different from other programming fields, and finally, I’ll provide some basic examples of tests using Unity’s Test Framework.
Manual Vs Automated Testing
Many programmers wonder whether they should use tests, like unit tests, for their code. However, this is the wrong question. Everyone tests their code in some way. The real question is whether to test it manually or automate the testing process. There isn’t a programmer out there who writes a piece of code, never runs it, and simply moves on to the next task. If no automated tests are in place, there’s still a manual process: you make changes, compile the code, run the program, input data to get it to the right state, and then check the results. If everything works as expected, you proceed to the next task; if not, you revise the code and repeat the process.
When viewed this way, manual testing can seem inefficient. Why waste time on repetitive steps when automation can do it for you in a fraction of the time? But there’s a catch: the overhead of creating the automation. Without this upfront effort, automated testing would clearly be the superior choice over manually repeating the same steps.
For programmers who want to adopt testing but struggle to integrate it into their workflow, the overhead of automation is often a key reason. The effort required to write tests decreases as you gain experience, but initially, following rules, principles, and best practices can feel tedious, taking significantly longer than simply running manual tests for small sections of code.
The second reason is the difficulty in seeing the long-term benefits of automating tests. It’s hard to predict how much time and effort will be saved, not only by testing the code you’re writing now but also by running those same tests whenever you refactor in the future. This understanding comes with experience. Early on, the significant time investment in writing tests, paired with minimal experience of the benefits, can make many programmers hesitant to adopt testing. Even when tests are required for a project, some developers treat them as an afterthought, manually testing their code first and only writing tests at the end to meet the requirement.
Ultimately, it’s about time investment. If the time and effort to write automated tests seem greater than the future savings from avoiding manual testing, many will resist. Because only experienced developers in testing can accurately judge the payoff, the best way to ensure a good investment for beginners, is to minimize the time and effort needed to write those tests. By reducing this overhead, it becomes easier to gain the experience required to appreciate their value. In practice, writing imperfect tests is better than not writing any at all, just as writing imperfect code is better than not coding. You can only improve at something you do poorly, not something you avoid entirely.
Ignore Rules And Principles At The Beginning
One of the biggest mistakes I see when programmers start writing tests is their attempt to follow all the rules, best practices, and principles right away. The concept of automated testing is straightforward: you write code that tests your code. Instead of manually going through the cycle of compiling, running, entering input, and checking results, you write code that does it for you.
All those rules and principles are important because they address problems that can arise when writing tests. But for a beginner, these problems haven’t surfaced yet. Learning solutions to problems you haven’t encountered and trying to apply all those principles can add unnecessary complexity, turning writing tests into a chore rather than a valuable practice.
In the beginning, just write a simple method that tests another method. Forget even the most basic principles. Ignore “arrange-act-assert,” forget about distinguishing between unit, integration, and end-to-end tests, and don’t worry about naming conventions, mocks, stubs, or mocking frameworks. Forget everything you’ve heard about writing tests.
It’s not that these things aren’t important, quite the opposite. But when you’re just starting out, the goal is to maximize your return on investment. Because you’re not yet used to writing tests, all these best practices and principles add complexity, making it harder and more time-consuming. Over time, as you see the benefits of automated testing, you’ll start to encounter the same problems others have faced. Questions like: What exactly is this test covering? Is it testing one thing or multiple things? Does it consider edge cases? How can I make my tests run faster?
All these problems already have solutions, found in the best practices and principles you may have read about and tried to apply. But by the time you encounter them, you’ll have already gained two important benefits: first, you’ll have experienced how much faster automated testing is, and second, you’ll have gotten used to writing tests. When you start incorporating solutions to the problems you face, the overhead will be smaller because you’ve already become accustomed to writing tests more quickly, and you’ll have a better sense of what to test and how much it will benefit you. This will improve your judgment about what and how to test, while allowing you to enjoy the advantages and speed of automated testing.
Tests And Bugs
Writing tests isn’t about eliminating bugs entirely. If that were the case, software wouldn’t have any bugs at all. The purpose of writing tests is to automate the testing of the things you believe need to be tested and to keep those tests in place for the lifetime of your program.
Manually testing your code may eventually result in it running correctly, but that doesn’t mean you’ll remember to manually check for every potential problem every time you refactor your code. Tests offer not only the advantage of checking functionality but also the benefit of permanence, once written, they remain. Every time you refactor, the same tests will need to pass. While tests might not catch every possible bug, they ensure that any bug you’ve encountered before won’t happen again. Regressions are minimized when you have accurate and thorough tests in place.
What I Test In Game Development
As I mentioned earlier, writing tests for game development is different from writing tests for other types of programming. This is because the code we write aims to meet the requirements set by game designers, who base these requirements on the experience they want players to have. It’s challenging to define requirements that capture a feeling, and as a result, gameplay requirements frequently change. For instance, how high or far a character jumps, the curve of the jump, and the acceleration and deceleration involved are all aspects that can constantly evolve. Writing tests for these elements, only to have to update them every time the requirements change, defeats the purpose of testing. Ideally, the test codebase should be written once and reused with each refactoring of the program’s codebase. For this reason, I don’t write tests for visual elements like the UI or gameplay code that is prone to change due to evolving requirements.
In game development, I typically focus on two categories of code when writing tests. The first category is for code that tests very specific functionality, unrelated to gameplay or visual elements. For example, my serialization system. Writing tests for saving and loading can save a lot of time, as it helps catch edge cases and proves useful during code refactoring. Any code that isn’t part of the gameplay but is specific enough that its requirements won’t frequently change is a good candidate for testing. This type of code is similar to what you might find in non-game programming projects.
The second category is code that is generic enough to function as an autonomous system, such as a library or framework. This type of code can be used across multiple projects and has specific, well-defined requirements that aren’t based on gameplay but on the needs of the system as a whole. Since this code must handle edge cases and will likely be refactored often, writing tests ensures it remains stable and bug-free, while also allowing it to serve as a plug-in for various projects. Such tests are also beneficial for documentation, by helping to understand how the code is expected to behave, why it was written, and what its outcomes should be.
While the documentation aspect of tests is less crucial for short-lived game projects, it’s invaluable for systems that act as tools, libraries, or frameworks. These systems tend to have a longer lifespan, and having tests in place allows developers to easily understand the expected behavior and purpose of each part of the code.
Test Examples
Finally, let’s take a brief look at the Unity test framework, formerly known as the Unity Test Runner. I won’t go into too much detail, as you can follow the provided link for a comprehensive introduction to the framework, and you can also download Unity’s Lost Crypt sample project. Both resources will give you a more in-depth understanding of testing than I could cover in a few paragraphs. Instead, I’ll focus on showing you how to write quick, simple tests to get you started—without worrying about best practices, principles, or the various schools of thought on unit testing.
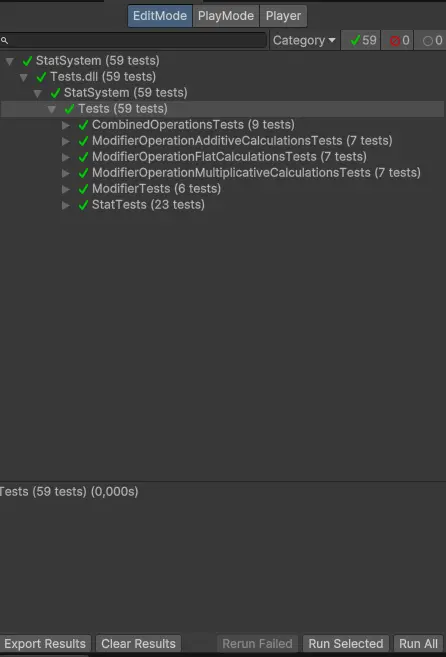
The examples I’ll share are from my Stat System project on github. These tests help me keep the project in a state where I can add functionality and refactor, even if months have passed since I last worked on it, as it’s a hobby project. Even when I don’t remember specific details of the code, these tests serve as documentation and give me confidence that the system’s behavior will remain consistent, ensuring that any changes won’t negatively impact the existing functionality.
Modifier Equality Checking
One of the problems in my Modifier struct was that when it was checking for equality between a default modifier and the default values given to the struct it was returning false. The reason was that the equality check was using the _type field instead of the Type property (see How To Ensure Correct Struct Initialization In C#). I could have written the following statements in an example script:
_defaultModifier = default;
_defaultValuesModifier = new Modifier(0, ModifierType.Flat);

if(_defaultModifier==_defaultValuesModifier)
    Debug.Log("OK");
To test it and then delete them, but the same can be done in a method inside a class for tests:
[Test]
public void OperatorEquals_EqualityForDefaultModifier_ReturnsTrue()
{
    _defaultModifier = default;
    _defaultValuesModifier = new Modifier(0, ModifierType.Flat);

    Assert.IsTrue(_defaultModifier == _defaultValuesModifier);
}
The benefit of having these tests is that whenever I refactor the Modifier struct, I don’t need to worry about its equality functionality breaking. Some might think that after implementing something that works, tests aren’t necessary because they assume the code won’t change again. But let’s consider this: Unity is transitioning from Mono to Core CLR, which means that support for record structs will eventually come, without any limitations. While this won’t happen for a couple of years, that’s even more reason to have tests in place.
By having tests for my Modifier struct, I can be confident that any future refactor, such as converting it to a record struct, will work just as well as it does now. Refactoring doesn’t always occur because requirements have changed; it can also happen when new features are introduced in a library, framework, or even C# itself that simplify the code. Having tests in place makes it much easier to implement these new features, as the tests provide practical verification of what should theoretically work.
Order Of Operations Test Example
Here’s another simple example: In the Stat System, all multiplicative modifiers must be calculated after all additive modifiers. This is currently achieved by keeping modifiers of the same type in their own collections, with those collections having a defined priority order. I could have tested this manually once, and if it worked, moved on. However, having a unit test for this ensures that if I ever change the implementation, I won’t need to worry about remembering to test not only this specific behavior but also every possible combination of scenarios.
For instance, in the future, I might decide to store all modifiers in a single collection and arrange them using a custom comparer. Having tests like the one below gives me confidence that any new implementation will function at least as well as the current one:
[TestCase( 0.2f,  0.1f, 169.4f)]
[TestCase(-0.1f,  0.1f, 96.8f )]
[TestCase( 0.2f, -0.2f, 89.6f)]
[TestCase(-0.1f, -0.2f, 51.2f)]
public void MultiplicativeModifiersCalculatedAfterAdditiveModifiers(float additiveValue, float multiplicativeValue, float result)
{
    _testStat = new Stat(BASE_VALUE);
    _additiveModifier = new Modifier(additiveValue, ModifierType.Additive);
    _multiplicativeModifier = new Modifier(multiplicativeValue, ModifierType.Multiplicative);

    _testStat.AddModifier(_multiplicativeModifier);
    _testStat.AddModifier(_additiveModifier);
    _testStat.AddModifier(_multiplicativeModifier);
    _testStat.AddModifier(_additiveModifier);

    Assert.AreEqual(_testStat.Value, result);
}
These are very simple tests that could easily be written as normal code, but the reassurance you gain from even the simplest test is significant compared to having no tests at all. Besides that, running them takes just a fraction of a second with the push of a button.
Conclusion
If you avoid writing tests because you think they’re more trouble than they’re worth, I encourage you to forget everything you’ve read about testing and simply try writing code that tests your code. If you ever find yourself making changes, compiling, running the program, entering input, checking the output, and repeating this process until it works, that’s the perfect moment to consider writing a simple test to avoid this cycle.
Once you see how much time you can save with even the most basic tests, you can start adding more test code whenever it feels useful. Over time, the experience you gain will naturally lead you to want to create more comprehensive tests that save you even more time. As you continue, you’ll eventually run into challenges with your tests, and that’s when all those rules and best practices for unit testing will begin to make sense. By then, you’ll have enough experience to appreciate the time investment writing tests is, and the overhead of writing tests will feel much smaller because you’ll be accustomed to the process.
In the end, tests can not only save you time but also protect against regressions and serve as documentation for your code.
Thank you for reading, and as always, if you have any questions or comments you can use the comments section, or contact me directly via the contact form or by email. Also, if you don’t want to miss any of the new blog posts, you can subscribe to my newsletter or the RSS feed.